
Category: Technology
-
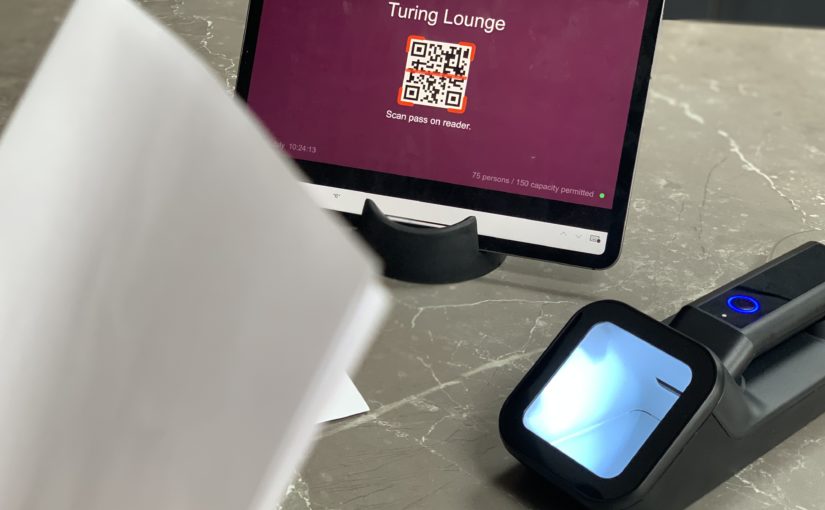
Event access management Power App with external barcode scanning for passes
I had a request from a customer who is running a 10-day event where attendees are permitted in certain areas. There will be in excess of 500 attendees who will all be issued passes that will indicate which area they are permitted in and the pass could include a QR code. Each of the entrances…
-
Gist extension for VS Code
Gist is a big part of my workflow. I’ve always been on the lookout for a desktop tool. Well, it turns out I was looking in the wrong place. A few days I discovered two VS Code extensions Gist and GitHub Gist Explorer. They both really great extensions and so far I’m really enjoying having…
-
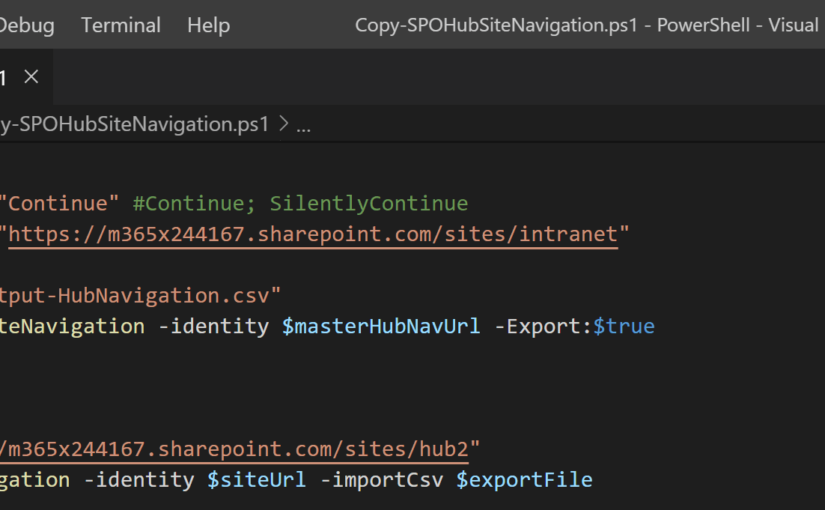
Replicate SharePoint Hub site navigation to other Hub sites
I have been working with a large government department where Microsoft Services helped them transform their intranet to SharePoint Online leveraging all the modern capabilities available as well as rethinking what an intranet was. This work included envisioning to fully exploit all of Office 365 and a crucial Information Architecture (IA) design which also mapped…
-

PowerShell to manage the modern SharePoint Footer
So I’ll start by saying how bowled over I am by the engagement I’ve had after posting a tweet sharing that I had programmatically updated the new footer. For this, thank you, this kind of engagement and praise is why I love the community and contributing to it. I want to share some numbers with…
-
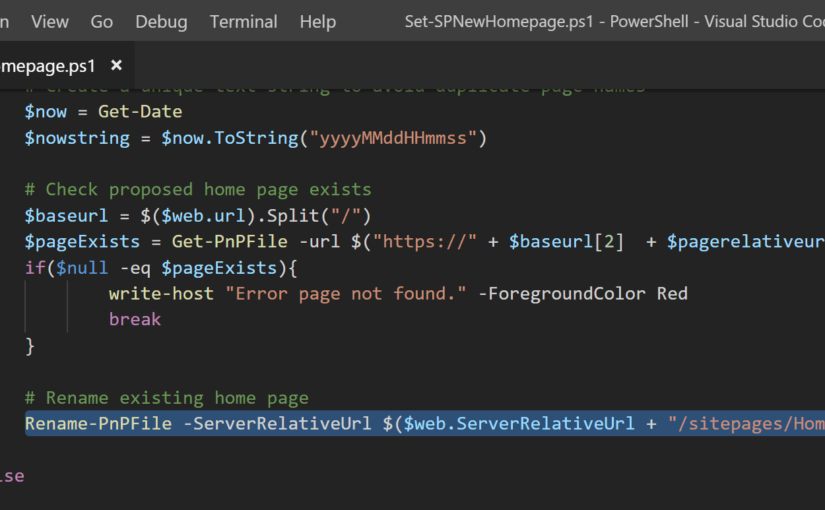
Switch between modern SharePoint homepages using PnP PowerShell
I’ve been working on a modern intranet project amongst over projects for the last 12-months. This has been more about the transformation of content and business processes, rethinking information architecture and reimagining a modern intranet than it has been about custom development. I’ve been working on a modern intranet project amongst over projects for the…
-
Tips on managing Office 365 demo environments
Some five years ago now, I blogged about how to login to multiple Office 365 identities or accounts at the same time using Chrome Profiles. With the fantastic new version of Edge (now built on Chromium), you can use different profiles just the same, and I share how browser profiles are such an import part…
-
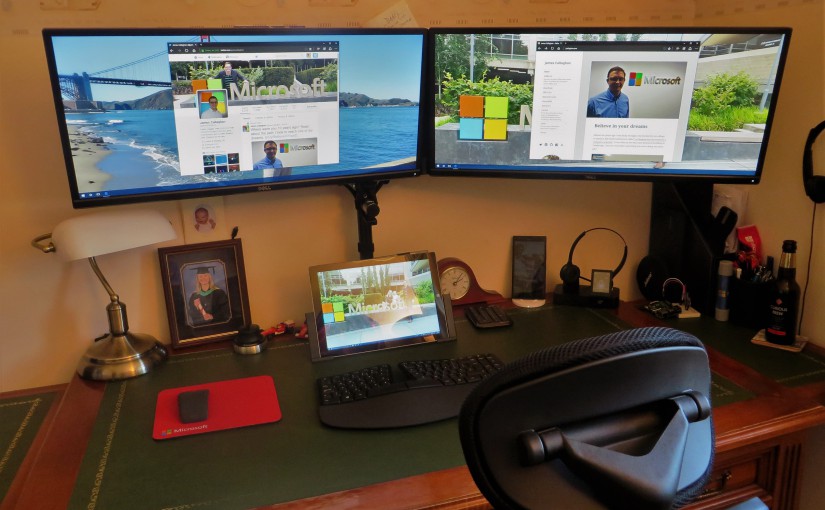
How to daisy chain multiple monitors on a Surface Pro 3 running Windows 10
I finally decided to create my dream home office setup however it wasn’t without complications due to a strange limitation with the new Windows 10 display settings. I thought the idea of daisy chaining multiple displays on my Surface Pro 3 dock using the single DisplayPort was not going to be possible. Let’s step back a few months. I recently…
-

#MSIgnite sessions available in a single spreadsheet
Update (31/01/15): Session spreadsheet updated and now includes 275 sessions. Those involved with SharePoint, Office 365, Yammer, the communities and the wider industry will already know about the Ignite conference Microsoft has planned for May this year. Microsoft published the conference sessions on the Ignite website this afternoon, introduced through this Office Blog post. The…
-
What types of email does SharePoint send automatically?
Update: After reviewing the SMTP logs, on a very active SharePoint 2013 environment and some further research, I now have an extensive list of the types of emails SharePoint sends. Most of these now include an example image of the email that is sent. I recently responded to a question posted to Twitter using the…
-

Event Receiver to Remove “Recent” from SP2013 Quick Launch
I’m sure removing the Recent heading from the Quick Launch in SharePoint 2013 has been talked about a million times over since SharePoint 2013 was launched. It’s been solved in this way and that way, by hand, with javascript and programmatically. In this post, I share the code to remove the heading with the ListAdded…
-
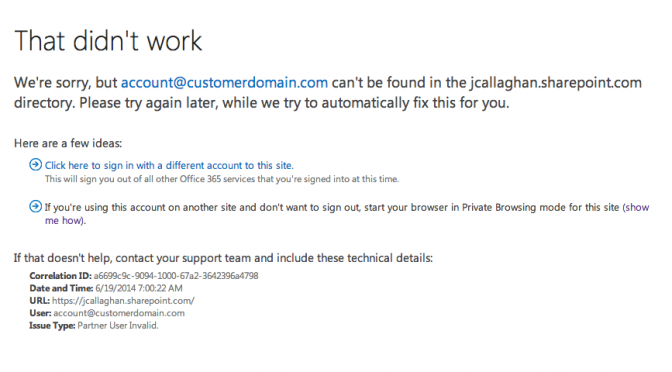
Login to multiple Office 365 & Azure accounts at the same time
A challenge for most administrators managing more than one or more Azure subscriptions or Office 365 tenants having to continuously log in and out with different credentials to do so. Many have developed techniques to work around this challenge by using Incognito Windows or Private Browsing and others use multiple Browsers. Even with these methods, you are…
-
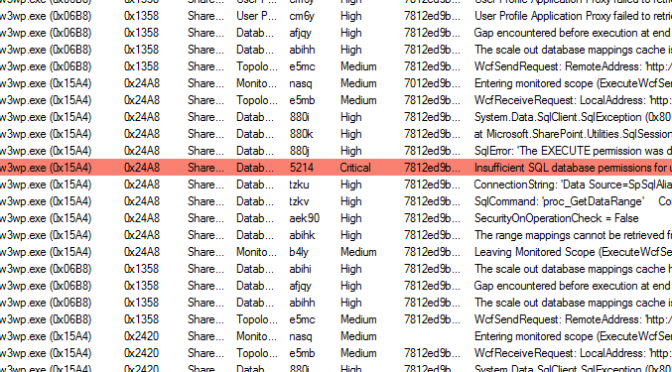
Long live the best SharePoint ULS Viewer
Update (15th June 2014): We may see a return of the SharePoint ULS Viewer very soon. Jeremy Thake and Office Dev indicated it is coming back to life very soon. @jamescallaghan its coming very very soon back to life officially ;-) — Jeremy Thake (@jthake) June 15, 2014 @diverdown1964 @jthake We’re going to…