Blog

  • Event access management Power App with external barcode scanning for passes

    Event access management Power App with external barcode scanning for passes

    I had a request from a customer who is running a 10-day event where attendees are permitted in certain areas. There will be in excess of 500 attendees who will all be issued passes that will indicate which area they are permitted in and the pass could include a QR code. Each of the entrances to the different areas will be staffed where passes will be checked. The different areas have capacity limits due to fire, Health & Safety and COVID19 reasons. The event is away from their normal infrastructure so they can’t rely on the normal access control systems we’ve become familiar with. Due to this, the customer felt a more automated approach to access management would be beneficial. They also run similar events throughout the year so any investment would be reusable. While I’d have preferred to break open the microcontroller toolbox and built some #IoT based pass readers but the customer wanted to use the Power Platform and their existing Office 365 investments.

    Power App event entry control kiosk. Prototype #1.
    Power App event entry control kiosk. Prototype #1.

    I started off with my usual design-first approach, sketching out some wireframes and mapping the customer’s requirements back to wireframes and building out personas, user journies and the solution architecture. Part of my wireframes led me to want to verify the barcode capabilities and reassure myself with the approach. I’ve built a number of solutions that have used both the old web barcode scanner and the more modern barcode scanner. While those solutions were a great success I never felt 100% satisfied with the scanner capabilities. I often found it hard to scan barcodes or would have to scan them multiple times increasing the overall time to complete a task. This is where my caution originated particularly creating a contact-free event access management solution to reliably handle such high footfall.

    Barcode scanning capability comparrison

    One of the advantages of the web barcode scanner control is that it worked on desktop and mobile and it is visible on the screen which made it very obvious to an end-user to scan something. The control is obsolete because of poor performance, and the mobile Barcode scanner control replaces this control.

    The mobile barcode scanner control is limited to Android and iOS and requires activation to enable the camera to start scanning.

    There are some tricks to activate scanning but this can make editing and use between desktop and mobile hard, particularly if you fall down the trap of activating scanning via the OnVisible action of a screen. At this point, you will lose the ability to edit the screen and instead get a warning about the control only working on Android and iOS.

    Error when using the Mobile Barcode Scanner in the browser or editor.

    Another option is to use a barcode scanner. This obviously isn’t a native control to Power Apps as it is effectively just a keyboard but there are lots of different styles of barcode scanners out there so these should be considered too.

    Hardware barcode scanner comparrision

    So after building out a proof of concept using the mobile barcode scanner and after numerous failed attempts to read a QR code, it was obvious this wasn’t going to be a solution I could rely on. So I decided to take a different approach. I knew barcode scanners are seen as a keyboard when connected to a device. So I switched out the mobile barcode scanner control with a simple text field. I was able to process any entered text using the OnChange action with a text input control. I knew this was going to be something I could try with a barcode reader so I decided to buy a couple of units to test with. I could have just used a cheapo barcode reader gun but I wanted something that would be similar to those used in the final access control entry point solution.

    One is similar to a checkout barcode reader. It’s a Lenvii E688 wired USB barcode scanner. It has a really helpful LED that is activated with nearby motion. It scans incredibly well and has an adjustable beep to acknowledge each scan. I tested this on my #Windows11 machine and on my iPad and iPhone with the help of one of those USB to appropriate device dongle adapter thingy-mac-things.

    The other, an Alacrity Bluetooth barcode scanner is a handheld Bluetooth and wired reader. It too has an LED and has the longest range of the two when reading bar codes. It also comes with a base that allows the reader to be docked for continuous scanning and powered where LED is on continuously scanning. The dock makes for a great pass barcode reader. Another benefit to this barcode reader is that it connects via Bluetooth and therefore allows for the barcode reader to be placed in a more accessible location without being prohibited by cable length. The barcode reader can also be removed from the dock and used in wireless handheld mode should that be needed.

    The event access management and entry conrol app

    I built a single app that could be used for the different tasks required to manage the attendees and passes for the event. The solution includes attendee registration and allocation of passes at the start of the event, attendee and pass management throughout the event, tools for Fire, Health & Safety marshalls such as capacity tracking and muster point registers and entry control pass scanning. I won’t go into detail on the full solution but will instead concentrate on the entry control features.

    Entry control

    The key part for the entry control task was that it should be fast, contact-free and act as a companion to support the person staffing the entrance. There is no fancy airlock doors or barrier system preventing someone from entering nor is there likely going to be any rule breakers storming in when not permitted. The entry control part of the app will speed up whether someone is permitted in that area and provides clear visual aids to the entrance staff.

    PowerApp Entry Point screen.
    Pass permitted to enter.
    Pass is not allowed to enter.

    Rather than place two devices at each entry point to handle people entering and exiting, I built the app to support it from a single entry point device. If you have scanned in successfully and entered, then scan again when leaving it will acknowledge you have left the area and remove you from the current capacity headcount for that area.

    The video demonstrates scanning pass to gain entry and then scanning again when leaving.

    The thing with the barcode reader approach is that it requires a text input to place the scanned barcode text into. In a kiosk-based solution, this isn’t great as end-users can “play” so I set about making hiding the control from the screen. First I made the control hidden but that prevented any input from the barcode reader. I then tried changing all the controls colours to match the background. While this made the text input mostly hidden I was still left with a flashing text cursor that I couldn’t hide. Finally, I set the width and height of the control to 0.

    Text Input is hidden by setting the width and height as 0.

    There is one problem though. You must use SetFocus(TextInput) to place the text cursor into the text box. This resulted in the ability to scan barcodes while not showing anything on the screen.

    Use SetFocus to allow scanned barcodes to be entered but the textbox to remain hidden.

    I hope this inspires you to think differently when approaching a project that could leverage barcode scanning in Power Apps but also inspires others to use barcode scanning as they create a really efficient solution for capturing data 💖. I’ll try to share some more pictures and updates as the solution progresses, particularly of the implemented access management solution and barcode readers.

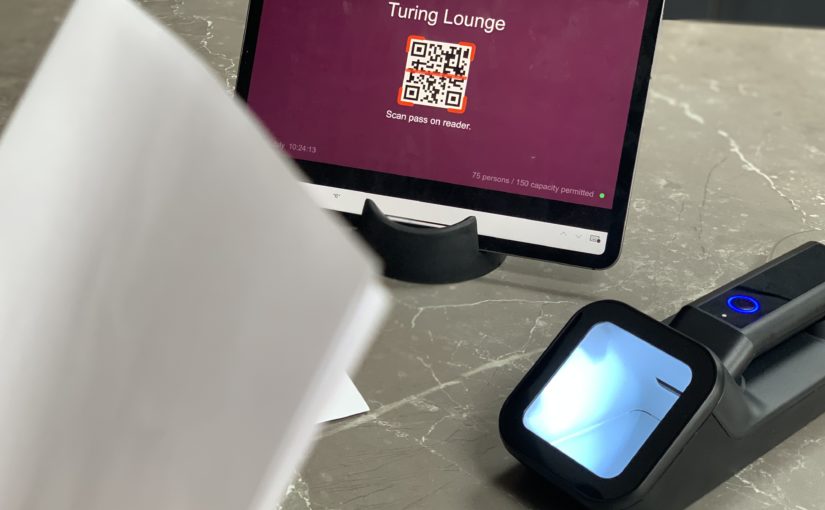
    Bonus: I ordered a tablet holder which arrived just before I published this post so I thought I could show some early pictures of the reader and tablet together to test how this could work for the event. I think it looks great 🤩

    Barcode reader attached to stand with tablet.
    Barcode reader and tablet together on stand.
  • Smart dog training buttons

    Smart dog training buttons

    At first, it seemed a silly idea to create buttons our new puppy could press to tell us she wanted something. A few weeks later, after introducing these to our new 8-week old puppy Poppy, it seems the idea was far from silly. Poppy has started to learn that something happens when she presses these buttons. What that something is, depends on the button Poppy presses. She has already grasped that one of the three buttons I created allows her to let us know she wants to go out into the garden when the door is closed.

    Poppy pressing the button at 9 weeks old.

    Sure the idea was silly and just an excuse to have some fun. I started off by prototyping with a standard Zigbee button, playing with notifications and the possible languages for text-to-speech messages. I created an amusing character for Poppy’s text-to-speech messages. After trying different languages and adapting some of the spoken words to be more playful and fun, Poppy now had a French voice, and phrases such as “Humans” were read out like “Hoomans”. At this stage of testing, my partner hadn’t vetoed the idea, so I progressed to the design stage.

    Often at this stage, I feel like “Sid”, the antagonist who lived next door to “Woody and the rest of his friends”, and cannibalised toys in Toy Story, mostly because I end up trying to retrofit my crazy projects into something that looks half decent. When I fail, the projects end up in that “special box” we all have, but those that succeed live on another day. While this might make you giggle, there is a serious element to it – that user experience. In the maker space, it is not uncommon to see exposed circuits and wires, etc. For me, that is part of the fun. But it isn’t something I want my final projects to resemble, so I seek simple, intuitive, and good-looking ways to enclose my final projects. This is one of those examples.

    Why does my dog need these?

    She doesn’t. But with a connected smarted home, the things you can do are endless! I’ve grown up with dogs all my life but never had a puppy. With this comes the great responsibility to train her. Rather than bark or scratch the door, I wanted to teach her to use one of these buttons which could notify us that she needs something.

    I guess the solution is no different to panic buttons, butler buttons, and shops or cafes where it would be helpful to get a notification and even leverage text-to-speech when a button is pressed. The options in Home Assistant are truly endless and really provide opportunity to create accessible and inclusive solutions. For example, the solution could easily integrate with lights or digital locks but also loop until something else is done like a door is opened.

    As I made three of these buttons I currently have them set up to notify me when Poppy wants to go play in the garden, one near her lead for when she wants to go on a walk and the other with her food.

    How to make your own pet smart button

    To make these buttons I brought a set of radio-frequency (RF) buttons. The pack included three nice-looking buttons each with a paw embossed on them and a receiver chime plug. I brought these hoping I could strip them and replace them with my own Zigbee button. Fortunately, the buttons were held together with a few small screws and came apart really easily. Inside was a small RF circuit which was easily removed again by removing a few small screws.

    RF-button remove from its case.
    RF-button removed from its case.

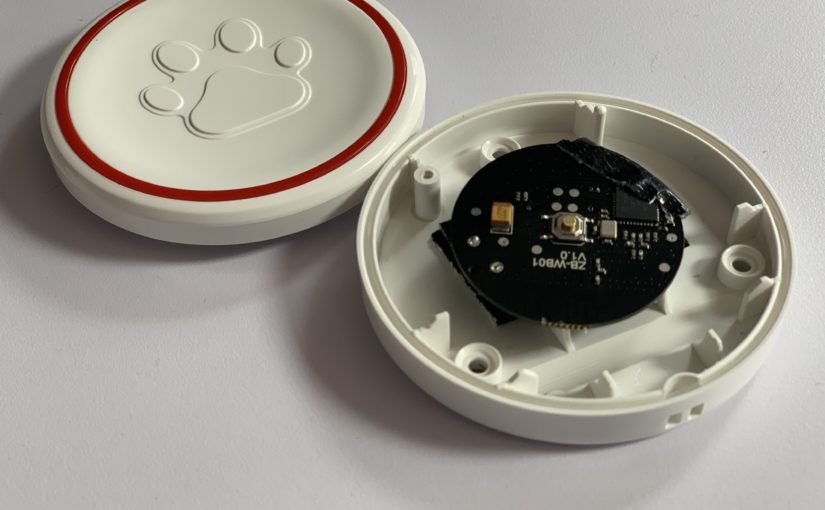
    For the “smart” part, the button, I brought a Sonoff SNZB-01 Zigbee button which I removed from the Sonoff case. This was slightly trickier and needed levering out. For this, I used a plastic ply tool and with a little wriggling was able to remove the circuit from the case. As the case is used to hold the battery in place I used some Gorilla tape to secure the battery to the circuit.

    Sonoff SNZB-01 Zigbee Button removed from its case.
    Sonoff SNZB-01 Zigbee Button removed from its case.

    Then comes the cannibalisation part, combining the new button with the case from the old button. The Sonoff button needs to be positioned in the RF-button case ensuring the button centre is placed in the centre of the case. This is so that when the case is pressed the button can also be pressed. I folded some tape over a few times to raise the Sonoff button slightly. Not over-tightening the screws on the case also provided more play for the button to be pressed.

    Sonoff SNZB-01 Zigbee button inside a case intended to be used by our dog Poppy.
    Sonoff SNZB-01 Zigbee button inside a case intended to be used by our dog Poppy.

    Home Assistant integration

    Home Assistant provides such great flexibility and extensibility. For this project, I created several helpers, which I use to apply the configuration to each button and to integrate each button press with a mobile notification and text-to-speech message which is played out over my Sonos speakers. My Home Assistant configuration is managed through YAML, but the same can be achieved in the UI.

    For each button I created the following helpers and automation:

    Trigger-based template sensor

    The Zigbee button fires events when pressed. I’m using a trigger-based template binary sensor to cause the state of the binary sensor to change when the button is pressed. This provides me with a sensor that I can show in the UI and also capture insights from.

    Note: I have a split configuration where my entities and integrations are defined in folders and YAML files. I wasn’t able to get this template sensor to work like other templates and had to store this in my main configuration.

    Messages

    Both the text-to-speech announcement and the mobile notification message are stored in the input_text helpers.

    Volume and Delay

    To control the volume of the text-to-speech message and the time between the next time the button can be used I created the following input_number helpers.

    Automation

    The following automation calls a text-to-speech script that snapshot my Sonos speakers, groups the speaker’s together, sets the volume and reads then reads out the message before reverting back.

    Lovelace

    Poppy has her own pretty cool dashboard where we track her health, food, and diet as well as her location from her LTE GPS collar. The buttons I made reside in their own Lovelace view in her dashboard.

    As with most, if not all my automation, I leverage helpers to manage the configuration used in the automation as described above for this project. I then expose the helpers in Lovelace which makes it easier to manage and change their values. For example, the volume and text-to-speech announcement and mobile notification are all changeable in the UI via this approach for each of the three buttons I made.

    Using the Fold Entity Row Card I often collapse helpers out of the way. Alongside these helpers, I’ve used the Mini Graph Card to provide insights into when each button has been interacted with over the last day. For those interested in the Yaml for the Lovelace cards, I have shared it here.

    Example Lovelace card for a single button, with helpers and insights in a vertical stack card.
    All three smart pet buttons in Poppy’s Lovelace dashboard.

    I hope this is helpful and other pet owners can see the benefit of these training buttons. If anyone needs me I’ll be training and playing with Poppy 🙌🐶🐾 and now doubt tinkering with some other fun project!

  • Can you IoT an Airwick air freshener?

    Can you IoT an Airwick air freshener?

    This project is one that makes me feel on top of the world but also possibly one of my most craziest IoT projects. I am fascinated with IoT and the point where software interacts with my physical world for example in the simplest form, a sensor programmed to turn a light bulb on when there is motion. I get huge joy from tinkering and exploring how things work but the real satisfaction comes from combining connected sensors, data, automation and machine learning and of course learning myself. This project was no exception.

    We’ve all most likely been into a public restroom somewhere and had the automatic air freshener trigger and possibly even make us jump out of our skin when it does. These units typically run on a schedule and spray some kind of air freshener into the room. Some are even a little smarter and trigger when there is motion in the room. Well I have a number of air fresheners like these in the house and sure they’re not necessary but I like them and they smell nice. What I don’t like is how they continue to work when I’m not in the room and even not in the house. This is entirely wasteful and not very smart. And well my house is smart so get with the programme! The other problem is if you’re like me and find it hard to sleep sometimes the noise of them spraying throughout the night is annoying and likely lead to me saying to myself was trying to get to sleep “I wonder if I can make these things smart“. I’ve likely fallen asleep as this stage and forgotten about the crazy idea, but clearly this one time I didn’t, so here I am writing about how to IoT Airwick air fresheners. Let’s consider a smart air freshener and how it would work if it wasn’t triggered by a manually.

    Motion. Rooms can be busy so triggering with each motion event would as wasteful as it spraying every 15 minutes now. But we could use motion in combination with when the air freshener last sprayed to ensure it only sprays every 30 minutes for example.

    Alarm state. If my house alarm is armed then that is a good sign I’m not home so the air fresheners shouldn’t work. This could also prevent them from working when in night mode but there is, of course, one the exception to that, the bathroom!

    Room based triggers. In the living room, if the TV is on or the sofa is occupied then the room is in-use. In the office, if my workstation is unlocked then I am likely working and the room is in-use. If my toilet is flushed and the bath or shower is in-use then that is a great indication the bathroom is in use. And yes, I’ve IoT’ed my toilet! Then there are exceptions like if I’m having a bath I probably don’t want it to be triggered as it would mess with my Zen.

    Spray interval. The unit provides some control over the frequency the air freshener sprays but this is limited to 9, 18 and 36-minute intervals. Why these intervals I don’t know but I’m sure Airwick have their reason. It would be useful to replicate this and allow longer intervals between sprays.

    Sensors. Throughout my house, I have a large collection of sensors and in a truly connected world, these should be considered too. For example, when the alarm is unarmed after a trip away the air fresheners could be sprayed to create a welcoming smell. If windows are open then I’d rather have the fresh air than the air freshener so don’t have them spray.

    Voice. In an inclusive world, voice assistants are increasingly used to perform tasks that ordinarily might have been out of reach for some people.

    So considering all of the above I decided to accept the challenge and IoT’ed my air fresheners. But with all these crazy ideas – I wasn’t going to compromise on the aesthetics. The look and feel could not be compromised. Let me walk you through it.

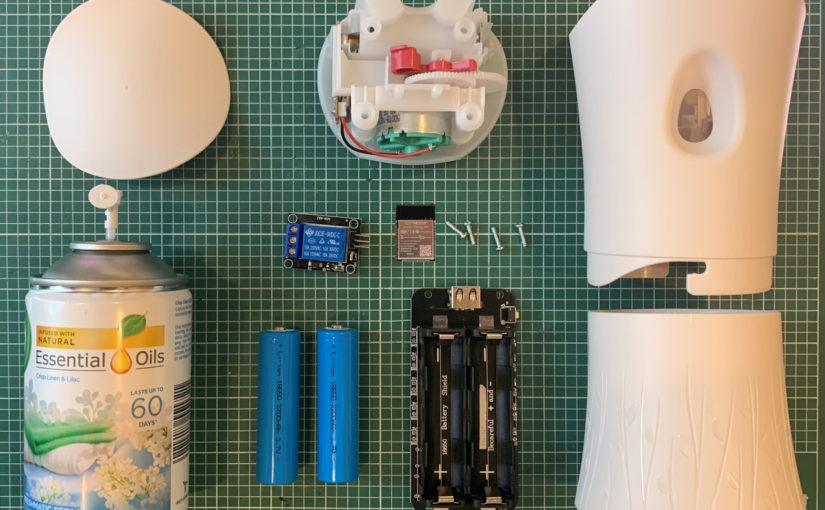
    Ingredients:

    Airwick Air Freshener

    The Airwick air freshener device is pretty discrete. It contains a can of the air freshener of your choosing and two AA batteries. Behind the scenes, there is a 3v motor which when powered, powers gearing that creates sufficient force to push down the nozzle on the can of air freshener. Notice the red plunger gear is only two-thirds round. This prevents the gearing from forcing the aerosol can to spray continuously and it runs out of gear. When the motor is no longer powered the gearing reverses from the return force of the nozzle of the can of compressed air freshener.

    Gearing and the plunger from inside an Airwick air freshener.

    The build

    This was quick to build out and I had a working air freshener activated through my NodeMcu in about 15 minutes.

    The components connected for testing.

    I planned to use a smaller ESP32 dev board but for this prototype, I’ve opted to use the standard board for ease of access. I made a few alterations to the plastic insert in order for me to place the components inside.

    All the components to make an IoT Air Freshener packed away inside.

    I also planned to use larger batteries but will need to 3d print a housing for that so for this prototype I housed the battery discretely on the back for ease of access and space reasons.

    The battery is discretely located on the back for the prototype.

    ESPHome

    In order to operate my air freshener automatically, I need something that I can programmatically control from Home Assistant. To provide me with the compute for this IoT project I turned to my trusted and favourite ESP32 NodeMcu board flashed with ESPHome. The ESP32 NodeMcu is powered from a battery and is connected to a relay. This relay allows a circuit to open and closes which then activates the motor and gearing inside the air freshener.

    Fritzing wiring diagram.
    Fritzing wiring diagram

    In 10 lines of configuration, I was able to create a switch that operates that relay and that’s it. It is as simple as that. To turn the switch on and off you need an interface. ESPHome provides the ability to do this through a web UI, MQTT or in my case through integration with Home Assistant. In fact, Home Assistant auto-discovers ESPHome devices so the switch I defined in my configuration is immediately available to use.

    To preserve the battery I decided to use the deep sleep and MQTT component in ESPHome. This allows me to wake the device, check the state of a MQTT topic. It then either triggers the air freshener or goes back to sleep depending on the state of that MQTT topic and save battery power.

    Home Assistant

    The brain of my house Home Assistant handles all the integration with ESPHome, other sensors and the home automation logic.

    ESPHome air freshener switch integrated with Home Assistant

    I won’t go through all of the different automations I have created to work with my new-fangled smart IoT air fresheners but instead, I’ll show you an example that in part is the most applicable for an air freshener. My bathroom air freshener. That particular air freshener is triggered when my IoT toilet is flushed and as automations go is the coolest toilet air freshener automation you will likely to ever see!

    For me, the data is as much fun to play with and analyse as the tinkering with all the hardware. To provide me with additional data points that I can study, I added a counter that increments each time the unit is sprayed and a date sensor to store when the air freshener was last replaced.

    To preserve battery life the ESP board goes into a deep sleep and wakes every few minutes to check if it needs to trigger the air freshener. This is achieved using an MQTT topic. I created an MQTT switch that is enabled when a binary sensor is on. This switch triggers the air freshener to spray and is reset before ESPHome sends the device to sleep again.

    Alexa – beast-mode level five-thousand!!!

    We all know there can be those moments when a little fresh air is most welcome. For those situations, I’ll leave you with this.

    Alexa, it’s stinky.

    This uses a custom component for Home Assistant called alexa_media_player. An Alexa routine is created to listen for that sentence which then set the brightness level of a virtual light created in Home Assistant to a particular level. Then an automation in Home Assistant is triggered. It checks which room Alexa was used in and then activates the air freshener a few times in that room.

    One thing I have noticed with Alexa routines is that I’ve always had to keep the wake sentences short and not complex in order for them to be picked up by Alexa. For example, for this I started with “Alexa, it is stinky in here” but her response would be “Sorry, I don’t know that one”. Instead, I simplified the wake sentence to “Alexa, it’s stinky and “Alexa, it smells”. This could be taken a step further and a routine could be used to activate all the air fresheners like “Alexa, freshen up the house” for those moments when you have someone special coming over!

    Screenshot of my it is stinky routine in the Alexa app.

    Closing thoughts

    This really could not have been made any easier and that is down to two great projects Home Assistant and ESPHome. I strongly recommend that if you haven’t explored Home Assistant, ESPHome or ESP32 NodeMcu for tinkering you give them a try.

    From this picture, it is impossible to tell that this Airwick air freshener has been IoT’d.

    I started by saying I would not compromise on the look and feel of the unit and hopefully the above demonstrates this. There are other benefits to this madness. My friends won’t freak out from the sound of the air freshener spraying nor think I think they smell! The air freshener will last longer and because I converted the batteries I can recharge them. I’ll be able to work out when the spray needs replacing from the data. Oh and I’ll be able to get off to sleep without hearing that clicking noise and troubling myself with such crazy ideas like this. For now at least!

    So while I’ve made a few jokes in this article and had lots of fun along the way, the point I want you to take away is that ideas can become reality. Crazy to you might not be crazy to someone else. Let your mind run away and be creative. The growth and learning opportunities are endless.

    I 💕 my Home Assistant

  • Turn lights on and off when Windows 10 is locked or unlocked

    Turn lights on and off when Windows 10 is locked or unlocked

    Like many, I have smart lighting throughout my house. This includes my office and desk. Behind my beautiful ultrawide monitor, I have a 3m Philips Hue strip which helps add some peripheral light and softens the glare when using the screen. I use scenes to adjust the level of white light towards early evening, but I’ll save that for another day. While I can manage the lights in the room based on motion, I wasn’t doing anything with my monitor lights as I might have been working, but the room could have had no movement. This would have resulted in the monitor lights turning off and would have been frustrating, so I decided to integrate whether my workstation is locked or unlocked or not with Home Assistant.

    My desk lights turning on when I unlock my Windows machine using Home Assistant

    Previously I had a PowerShell script that I could run that would hit the Hue API to toggle my lights on or off but since I have moved away from my Hue bridge this no longer works plus it wasn’t automated, but this was a good starting point. The sysadmin in me remembered there was a trigger in Task Scheduler that would be a task when the workstation was locked or unlocked, which gave me the trigger for my Home Assistant integration.

    Picture of the trigger screen in Task Scheduler showing the different triggers that are available.
    Workstation lock/unlock triggers in Task Scheduler

    The next part was talking to the Home Assistant to perform service calls such as light.turn_on or scene.turn_on. Fortunately, I know Home Assistant provides great extensibility and has a fantastic rest API, so that was Home Assistant. This just left the process to call the API. For this, I wanted to stick with PowerShell as it is very versatile and I use it all day long anyway.

    I had a prototype working very quick, but I wanted something more modular and parameter-based to use for other things. This is when I took found Flemming Sørvollen Skaret’s Home Assistant PowerShell Module. His PowerShell module is awesome and really handy. I was off and running with it within minutes. So I decided to leverage this module in my Task Scheduler automation. And that was that, but I still had to hook it all together.

    • 2 x Task Scheduler Tasks – triggered when the workstation is locked and unlocked
    • 1 x VBScript to launch our PowerShell script so it is hidden
    • 1 x Flemming’s Home-Assistant PowerShell Module
    • 1 x PowerShell script to call the Home Assistant API
    • 1 x Home Assistant long-live token
    • 1 x entity in Home Assistant (a light, scene or input_boolean for example)

    Task Scheduler

    First I created two tasks in Task Scheduler. One for when the workstation locks and the other for when it is unlocked. When these tasks are triggered, they call a VBScript with some parameters. Yes. An actual 1900’s VBScript in 2020. For the life of me, I could not stop or prevent the PowerShell console from flashing up. I’m a UX nerd, and this wasn’t acceptable for me. I spent way too long on trying to solve this before I reverted to this well-known workaround of using WScript to execute the PowerShell script silently. These have been exported from Task Scheduler and therefore can be imported straight back in obviously correcting usernames and paths.

    You will notice on line 46 above calls a common TaskSchedulerLauncher.vbs script along with the path to a ps1 file and the parameters to go with it wrapped in double-quotes.

    Are you using a battery-powered device?

    Geert van Horrik (@GeertvanHorrik) kindly pointed out that if you are using a battery-powered device like a laptop or a tablet you will need to change the conditions so the task runs when on battery power.

    Power settings for a task in Task Scheduler

    VBScript

    Having to use the VBScript is annoying but not as annoying as the PowerShell console flashing up each time I unlocked my workstation. It calls PowerShell.exe and our script while also setting the window style to be hidden.

    PowerShell

    In order to interact with the Home Assistant API you will need a long-lived token. You can create one in the Long-Lived Access Tokens on the profile page (http://localhost:8123/profile). Be sure to name it something sensible and meaningful.

    The token and information about my Home Assistant instance are stored as variables in the script. The service I want to call such as light.turn_on, scene.turn_on and input_boolean.turn_on and the entity_id (input_boolean.james_desk) are passed to this script as parameters.

    Additionally, as the PowerShell script contains the token to Home Assistant I store the script within my profile and limit the permissions to the file to just myself.

    Home Assistant

    I started off by just toggling the state of my monitor light but I shortly realised I could achieve more if I knew my workstation was unlocked so I created an input_boolean.

    I toggle the state of this each time my Windows 10 machine is locked and unlocked. This means I can do more than just turn my lights on or off. I use this input_boolean in my motion automation which prevents my room lights from turning off if my workstation is unlocked (no more crazy waves). It also stops my Dyson fan from oscillating and directs it towards my desk and changes the speeds if the temperature is above a threshold. I can also choose route TTS notifications through to my desk Sonos speakers or HTML5 notifications to just my workstation.

    Best of all with Windows Hello I just sit down at my desk, and Home Assistant handles everything else because it knows my workstation is unlocked and the chances are I’m working or tinkering with something at my desk.

    I’ve also used the same PowerShell method to create a set of quick actions that I can call from buttons on a Home Assistant Stream Deck board where I can call my favourite playlists and scenes. I’ve also created some TTS scripts to announce and nag when chores need to be done or when it is dinner time! I think I’ll save that for another post!

    I 💕 my Home Assistant

  • Delicate mushroom risotto

    Delicate mushroom risotto

    I’ve always been fond of risotto and during a work trip in Rotterdam, Netherlands this was reconfirmed when I had what was the most incredibly delicious mushroom risotto. Since then I have been just dying to cook it. But to cook it like the dish I had in the Netherlands I’ve had to source some special ingredients that I’ve never cooked with before. Not only is this an absolutely delicious risotto it was fun to research and cook. The trick though to any risotto is to keep stirring and use a hot stock so the risotto rice releases its starch which creates the beautiful creaminess that the best risottos have. If you don’t have any speciality mushrooms use what you already have at home.

    I hope you enjoy my take on a classic risotto recipe inspired by chefs Theo Randal and Marco Pierre White.

    My first attempt at a delicate mushroom risotto with truffle

    Delicate mushroom risotto

    Recipe: Delicate mushroom risotto
    Serves: 2
    Prep Time: 20 mins
    Cook Time: 25 mins
    Ready in 60 min
    Category: Main

    Ingredients

    • 3-4tbsp olive oil
    • 4 tbsp butter
    • White truffle oil
    • White wine
    • 2 garlic cloves, crushed over salt
    • 2 shallots, chopped
    • 2 sprigs of thyme
    • Fresh parsley, chopped
    • Rocket leaves
    • 700ml chicken stock
    • 50g dried porcini mushrooms
    • 400g shiitake or wild speciality mushrooms carefully, chopped
    • Slice of black truffle
    • 50g block of parmesan
    • 300g arborio rice
    • Salt and pepper to taste

    Method

    1. Warm 700ml of chicken stock. Using hot stock and hot rice before adding the stock will allow the rice to cook evenly.
    2. Carefully chop the larger mushrooms while keeping the texture.
    3. Place the dried porcini mushrooms into 200ml of chicken stock and allow to soak for 20 minutes.
    4. While the porcini mushrooms soak, finely chop the fresh parsley, garlic and shallots.
    5. Grate the Parmesan but keep some back to slice grate over the risotto when serving.
    6. Drain the porcini mushrooms but make sure you keep the stock back for later.
    7. Heat 1 tsp of olive oil and a knob of butter over medium heat and cook of the mushrooms for about 5 minutes to reduce their water and intensify the flavour.
    8. Add the porcini mushrooms and continue to cook for a further 3 minutes.
    9. Add a nice generous glug the truffle oil, seasoning and a sprig of thyme.
    10. Transfer the cooked mushrooms into a bowl.
    11. Then in the frying pan with medium to high heat add 1 tsp of olive oil and a knob of butter and sweat off the chopped garlic and shallots for 2 minutes until they’re sauteed.
    12. Add the rice and keep stirring until the is evenly coated in the oil until the rice is translucent (4-5 minutes).
    13. Add the good splash of white wine to deglaze the rice and stir until it has all been absorbed (2-3 minutes).
    14. Add a small amount of chicken stock (100ml). Stir and allow the stock to be absorbed.
    15. Keep adding stock in small amounts (100ml) while continuing to stir until it is absorbed. This allows the stock to mix with the starch from the rice and create a creamy risotto.
    16. Once the rice is almost al dente pour in the stock used to soak the porcini mushrooms.
    17. Carefully introduce a few shavings of black truffle.
    18. Add the thyme, parsley and mushrooms.
    19. Continue to add the last of the stock while stirring for a further 15 minutes.
    20. Finally, add the parmesan, seasoning to taste and the final two knobs of butter and stir until melted then cover and rest for a few minutes.
    21. Stir before plating the risotto and serve with a topping of rocket leaves, parmesan and a small shaving of truffle.

    Use my mushroom risotto recipe Pinterest board of inspiration

    I’ve created a Pinterest board with samples of ingredients, recipes for inspiration, presentation tips, videos and photos of my own dish.

    Other inspiration

  • Gist extension for VS Code

    Gist is a big part of my workflow. I’ve always been on the lookout for a desktop tool. Well, it turns out I was looking in the wrong place. A few days I discovered two VS Code extensions Gist and GitHub Gist Explorer. They both really great extensions and so far I’m really enjoying having Gist at my fingertips in VS Code.

    vscode-gist-profiles
    Gist
    Screenshot
    GitHub Gist Explorer

    Once you have installed the extension you will need to grab yourself an access token for GitHub – you can get a personal access token by going to settings and then accessing Developer Settings. Make sure you just give the token access to Gists.

    GitHub Gist Explorer seems to be my favourite so far. Having the explorer available in the side pain really helps and the command bar paste and save from clipboard features are really great!

    How do I use Gist

    The majority of my use if private where I have created secret Gists. I have a number of markdown Gists which I have named Gistsmarks which I use as bookmarks to jump to a collection of Gists like boilerplates for my blog articles.

    Any code I share on my blog is shared as a Gist. This allows me to embed the code in the article with a nice editor and provides me with version control too. When I started using Gists I painstakingly went through all my posts and converted any previous code blocks into Gists. Oh, and when I reference code I use the highlighted line(s) URL which is a cool trick too.

    Highlighting code in a Gist with the URL

    I also use Gist to share code and snippets with friends and customers (when it is appropriate of course). I also have runbook like Gists to quickly reference which provide basic lines of PowerShell to perform tasks and run common commands against Microsoft Teams in Office 365 for example. I also have a markdown file for each of my demo environments where I hold information about different personas I have created, areas where I have built out certain functionality and a basic changelog.

    While I’m on the topic of VS Code extensions I think I will write another post and share my favourites VS Code extensions.

    Hopefully, you got the Gist of things! See what I did there….I’ll get my coat.

  • Little Morton Hall

    Visited Little Morton Hall, another National Trust property this weekend. This is a very wonky Tudor property that has been left entirely in its original state. The great gallery has some claims to tennis. I have shared a few more photos that are available on 500px here.

    National Trust: Little Morton Hall
    National Trust: Little Morton Hall
    A very wonky Tudor hall.

    You can browse my published portfolio over at 500px. Be sure to share your feedback.

  • Rutting Deer @ Tatton Park

    I recently visited Tatton Park in Knutsford where the deer were rutting. This is a beautiful park to walk and plenty to do for kids too! This was my first time photographing deer this close and they gave me plenty of opportunities. I have shared a few more photos that are available on 500px. This trip might just cause me to go an buy a new lens. A really big long new lens!

    Deer rutting at Tatton Park, Knutsford
    Deer rutting at Tatton Park, Knutsford
    My favourites from Tatton Park
    I did get a really big lens!

    You can browse my published portfolio over at 500px. Be sure to share your feedback.

  • Granada, Spain and Gibraltar

    A recent trip to Granada, Spain filled me with joy after an absolutely stunning guided tour around the Alhambra. I also found a little gem of a steak restaurant called Apo restaurante on Plaza de San Lázaro 15. The trip finished with a road trip over to Gibraltar and Seville. The views of Africa from the top of the Gibraltar rock where breathtaking. The guided tour also provided an opportunity to get close to photography the Barbary macaque monkeys. Seville has plenty of sights to take in with my favourites being the Cathedral of Saint Mary and the Plaza de España. I have shared a few more photos that are available on 500px.

    Barbary macaque monkeys, Gibraltar

    You can browse my published portfolio over at 500px. Be sure to share your feedback.

  • Rufford Old Hall

    A beautiful day to visit this Rufford Old Hall, a National Trust property. The grounds are lovely to walk as is the canal which is only a few minutes away. I have shared a few more photos that are available on 500px.

    National Trust: Rufford Old Hall
    National Trust: Rufford Old Hall

    You can browse my published portfolio over at 500px. Be sure to share your feedback.

  • Replicate SharePoint Hub site navigation to other Hub sites

    Replicate SharePoint Hub site navigation to other Hub sites

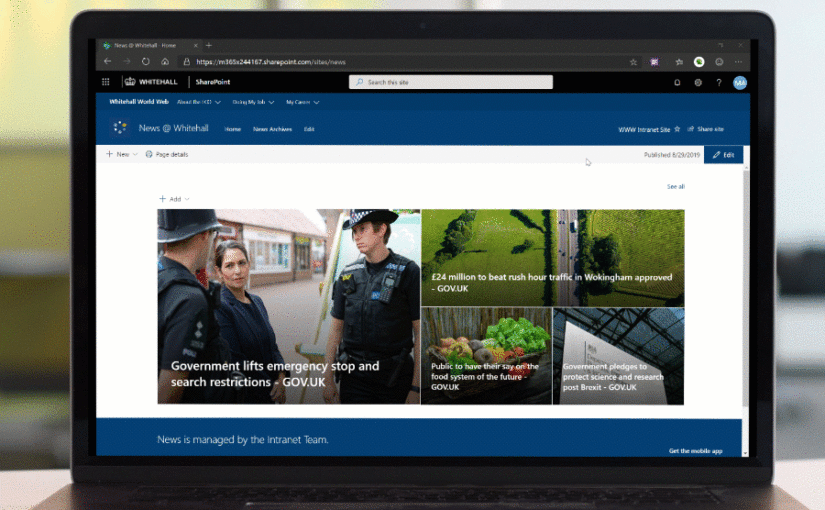
    I have been working with a large government department where Microsoft Services helped them transform their intranet to SharePoint Online leveraging all the modern capabilities available as well as rethinking what an intranet was. This work included envisioning to fully exploit all of Office 365 and a crucial Information Architecture (IA) design which also mapped their existing, complex and poorly performing hierarchy of subsites to several new hub sites and a completely flattened site structure. I hope to write more about this work soon.

    Primary intranet site navigation provider

    To create a consistent user experience, the look and feel for several hub sites was replicated, creating the feel of a single intranet. The hub site navigation also needed to be replicated, and that is wherein the challenge lay. The navigation cannot be easily copied from one site to another, let alone between hub sites, and thus this solution was born.

    We decided to create a dedicated hub site that only the intranet team can access. Within this hub site, we were then able to create the intended intranet navigation and get the headings, order and links just right without troubling anyone. Once we were happy with the navigation and testing successfully passed, the idea was that we would be able to replicate the hub site navigation to all our other hub sites. More importantly, the process could be easily repeated, keeping the intranet navigation updated across many hub sites. The task could also be automated but we opted to leave it as a manually initiated task.

    Script to replication hub site navigation to other sites

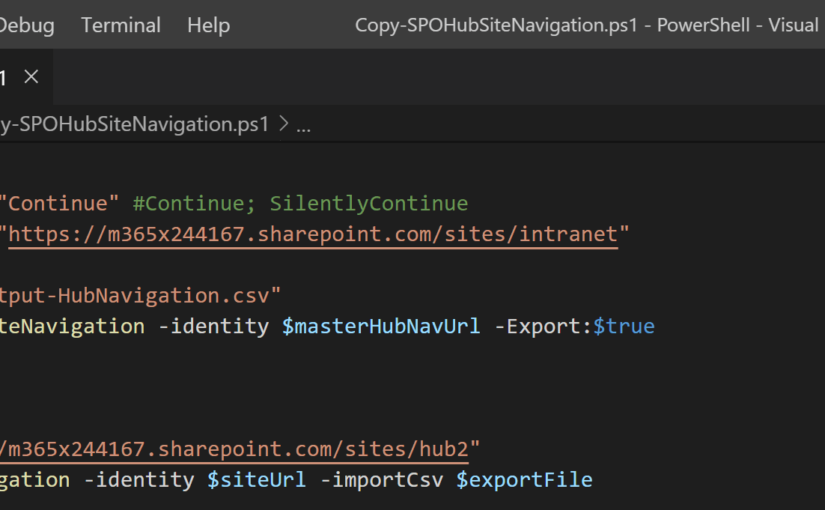
    The solution to the problem is a PowerShell script made up of two functions. One function that gets the navigation from the hub site acting as the master or primary navigation provider (supplied from a parameter). The other function replicates the navigation to other hub sites. The Get-SPOHubSiteNavigation function exports the hub site navigation from the site provided to a CSV file. The CSV file is then used by the Copy-SPOHubSiteNavigation function to replicate the navigation links to other sites. The process could be hijacked somewhat to add hub site navigation from a CSV file rather than reading it from an existing hub site. We found it was easier to get a feel for the navigation in a real SharePoint site rather than work with the information in a spreadsheet.

    Screen recording of the Copy-SPOHubSiteNavigation replicating navigation between two hub sites.
    Screen recording of the Copy-SPOHubSiteNavigation replicating navigation between two hub sites.

    You can also disable the export process by setting the -Export parameter to -Export:$false. This switch makes the Get-SPOHubSiteNavigation quite useful for displaying the hub site navigation in an accessible collection. This collection can be used with pipe functions, to filter or sort the collection, for example. This collection is also much easier to work with than using the Get-PnpNavigationNode -Location TopNavigatioBar -Tree cmdlet and parameters to show the full navigation structure.

    Hub site navigation collection displayed in a table.
    Hub site navigation collection displayed in a table.

    Observations

    As with many of my posts, I like to share any observations I have made during the work.

    • The cached Hub navigation appears to refresh every 30 minutes if left unchanged. You can force the cache to refresh by editing the links and then clicking cancel.
    • A JSON file gets saved to the /_catalogs/hubsite library which could be related to the cached navigation. It has a GUID based name e.g. 20d31c78-8a8c-499a-b953-ecc673344cef.json and appears to get modified by the System Account when changes to the hub site navigation are saved.
    • The cached JSON file looks like this:
    • This JSON file, in theory, could be read from a source site and the navigation element copied and injected into the JSON on a target site through manipulation of the JSON payload and the /_API/navigation/SaveMenuState API.
    • When trying to add a new navigation node using the Add-PnpNavigationNode cmdlet. If the parent node was invalid I got the following error. This wasn’t because the URL linked to a file or folder that didn’t exist as the error below suggests. Dave Garrad kindly calls out the fix for thisThe fix is to add -External to the Add-PnPNavigationNode cmdlet to tell PowerShell that the link is not in the same site collection.
    Add-PnPNavigationNode error
    Add-PnPNavigationNode : error when no resource or file is available from the Url supplied.
    • The script could benefit additional error handling, particularly to ensure the target site(s) provided are registered as hub sites.
    • Bonus tip! If you find you have lost changes to the navigation, this same JSON file is part of a library where version history is enabled. This file appears in hub sites and sites associated with a hub site. The version history might help you recover from any loss, but you won’t be able to restore it as the library appears to be read-only.
    Version history available for JSON file which I suspect ins the cached hub site navigation
    Version history available for JSON file which I suspect ins the cached hub site navigation

    I hope you find this post useful. As always #SharingIsCaring

  • PowerShell to manage the modern SharePoint Footer

    PowerShell to manage the modern SharePoint Footer

    So I’ll start by saying how bowled over I am by the engagement I’ve had after posting a tweet sharing that I had programmatically updated the new footer. For this, thank you, this kind of engagement and praise is why I love the community and contributing to it.

    My tweet sharing my excitement after creating the PowerShell to manage the modern footer in SharePoint Online.

    I want to share some numbers with you, which was one of the main reasons for pursuing this task.

    1. My customer had 180 sites where the footer needed configuring.
    2. Settings, change the look, select footer (three clicks)
    3. Enable footer, browser and select a logo and then upload it, enable displaying the footer name and then add the footer name text, apply settings and close settings (eight clicks)
    4. Edit links (one click), create a new link, add text, add a URL, save the link, then (four clicks) and then repeat for three other links (twelve further clicks). Then save the navigation (one clicks). Eighteen clicks for footer links.
    5. That is a total of 29 clicks per site — a total of 4,860 clicks for all these sites.

    Almost five thousand clicks is a lot of mouse work and this number doesn’t even factor in browsing to each site nor typing each of the values and URLs, which leaves a lot of room for errors too!

    Screen recording showing a click counter of the work involved in configuring the footer at scale.
    Screen recording showing a click counter of the work involved in configuring the footer at scale.

    #ThinkLean #WorkSmarterNotHarder

    To emphasise just why I wanted to achieve this programmatically. Colleagues started to perform this manually while I did some R&D. During this time a collection of sites were updated. However, even with signed-off designs, change request and final confirmation, the customer still changed their mind hence why I like to code and work lean. This kind of change is not uncommon. However, for any organisation that centrally manages sites, has a flattened modern information architecture (IA) or a Hubified intranet with many sites where a standard and consistent footer might be wanted, not being able to manage the footer through PowerShell or other means is a problem. Even managing variations of a standard footer is likely to be an issue for if there is no way to handle it programmatically. 

    The intranet team within a large government department I have been working closely with over the last two years are responsible for close to 200 sites. Performing tasks against these sites and making changes to them efficiently using PowerShell or other means is essential. Finally, we should not forget that trends, standards and regulations change over time. One such example is that regulations for internet and intranet sites within the government might require that certain information must be readily available from the footer, which would lead to a need for wide-spread changes. Even with their carefully designed flat site structure as part of their information architecture (IA) which leverages Hub sites this change is still site-by-site as the footer configuration is not inherited from a Hub site and therefore set independently.

    Exploring how the Footer works

    So with all this in mind, I started to explore how this could be achieved using PowerShell. The options and tools are limited and restricted given the environment. I felt that if this could be through the UI, then there must have been an API I could play with to achieve the same result. Off I went in my lab using Fiddler, SharePoint Online Client Browser, Edge Insider developer tools, Postman and VS Code. Troubleshooting and reverse engineering things is a childhood pastime. I found many other exciting easter eggs during this exercise that I hope to share too, but it was like there was a bounty on resolving the footer configuration.

    Colleagues in my team were also looking for a solution to similar problems for their customers. A colleague quickly followed up about some undocumented verbs he found in the site design schema (see Site design JSON schema on Microsoft Docs). This news also confirms what I learned from some PG colleagues. Sadly, the footer only has site design support right now.

    What I discovered through Edge tools that each change to the footer through the editing footer links or from the change the look pane invoked an API post to “/_API/SaveMenuState”. This post had a JSON payload with the configuration of the footer and also included any footer links. Win!

    Developer Tools in Edge where I discovered the call to /_api/navigation/SaveMenuState
    Developer Tools in Edge where I discovered the call to /_api/navigation/SaveMenuState
    Full JSON payload sent to the SaveMenuState API in Edge Developer Tools.
    Full JSON payload sent to the SaveMenuState API in Edge Developer Tools.

    Initial approach and exploration

    I took off with examples of this JSON payload that I obtained from Developer Tools after applying several different footer configurations. I started exploring how the API worked using Postman (this is an excellent tool by the way). To use Postman, I had to create an SP app to get an auth token from AAD so I could use Postman with SPO APIs. I gave the app full tenant access so I could explore things better. Getting started with Postman was a great lesson and one I want to share in a separate post, but Postman is now a vital tool for me when working with SharePoint Online. Once I had played with the API, I set out to achieve the same behaviour in PowerShell. 

    Screenshot showing a API test in Postman
    Testing different submissions to the API using Postman.

    PowerShell Script

    I set out with the intent to share my work as I know this was going to be of interest to lots of others. I decided to create multiple functions, so each part of the footer can be configured separately. I also built this with a view of contributing and sharing it as part of the SharePoint PnP module. The code is functional and not perfect. Let me walk you through it and share the entire thing at the end too.

    Note: the script uses the debug log the output information ($DebugPreference = "Continue").

    Enable/Disable SPO Footer – These two functions were created to quickly enabled and disable the footer with a simple function call.

    Get/Set SPO Footer (Logo and Text) – It is useful to be able to get the configuration of both the footer text and the footer logo. These functions can be helpful to validate the configuration, for example. These both exist in the JSON as nodes with consistent GUID for their “title” and similar they both have a “key” that identifies them. To simplify the functions I created an overarching function to run them all.

    Get/Add/Remove Navigation Links – This needs further work but it could leverage the existing Get/Add/Remove-PnpNavigationNode cmdlets. For my customer, I hardcoded the URLs in the JSON payload on line 417 but I provided a sample of how this looks on lines 408-415.

    Sample Usage – Examples of how this can be used has been provided lines 435-471 but here is an example of the functions.

    • Enable/Disable-Footer – Enables and disables the footer
    • Get/Set-SPOFooter – Get the configuration of the footer
    • Get/Set-SPOFooterText – Set the footer text
    • Get/Set-SPOFooterLogo – Set the footer logo
    • Set-SPOFooterLinks – Create footer links

    Full script

    Here is the script with all the functions and some examples. I’m going to reach out to Vesa and the PnP team to see about getting this included somehow. But, for now, enjoy. If you have any issues or comments, please let me know!

    Quirks to be aware of

    During my testing, I noticed a number of quirks I had to work around or that I want to share and make you aware of.

    1. When using Postman between sessions, you must refresh your auth token to continue accessing SPO.
    2. No value is available when reviewing $site.FooterEnabled using the Get-PnPSite cmdlet so you cannot check to see if the footer is enabled or not.
    3. When getting the footer, I noticed there seem to be several different states for how the footer configuration which might impact the GET functions however I have tried to mitigate this risk.
      1. Disabled
      2. Enabled with no configuration
      3. Enabled, but the JSON appears similar to when it is it disabled
      4. Enabled with configuration and or links.
    4. I noticed some sites had the footer enabled after the footer feature was released, while others it was disabled, this was why I built the function to check how the configuration of the footer.

    I hope you find this post helpful. Your engagement and feedback are what drive me to write posts like this, so please keep it up!

    #SharingIsCaring