The estimated reading time for this post is 2 minutes
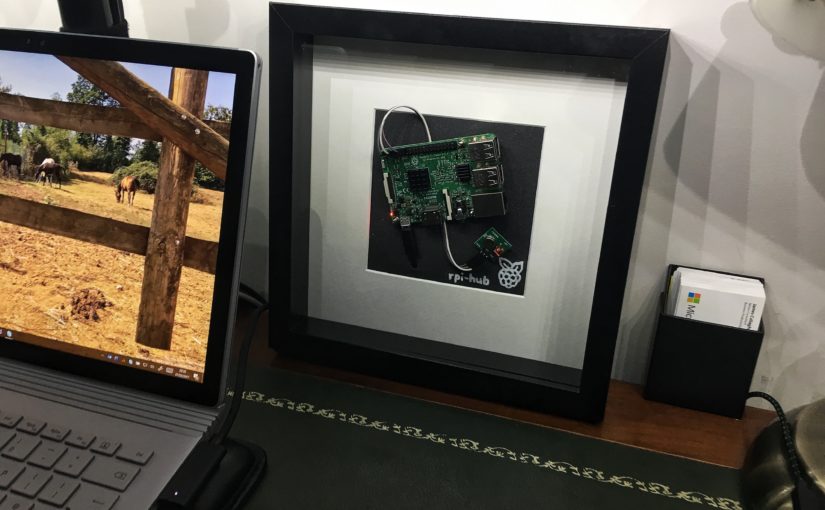
A picture can tell a thousand words. That’s just what I wanted to achieve by placing my Raspberry Pi into a picture frame. This all started with a long trip to IKEA over the weekend. One of those trips where you get to the car and realise you have way too much to fit it all in the car. During this long trip, I spotted a thick picture frame. My mind jumped at the thought of placing a working Raspberry Pi within it. Well, this evening I decided to give it a try and went about trying to house a Raspberry Pi in the picture frame and succeeded.
Built myself a rather elegant #raspberrypi case this evening to house my #openhab server. #homeautomation pic.twitter.com/jJZwjUbUAj
— James Callaghan (@jamescallaghan) February 7, 2017
I researched how others might have tackled this. My searches returned examples where people have made a digital picture frame as opposed to housing or framing a Raspberry Pi in a traditional picture frame. Bizarrely the one example I did find, Digital PI-cture Frame by David Park was from IKEA Hackers. Great minds! This, although some years old was what I had pictured in my head.

I love my tech and whilst I appreciate the clean, tidy and organised side of life. Sometimes I hate hiding things away too. This isn’t just any Raspberry Pi, this is one that is the hub of our home automation. One that should be out on display for everyone to see.
I was really torn whether I should house a Raspberry Pi 3b or a Raspberry Pi Zero within the picture frame. They are both absolutely beautiful and remarkable devices. In the end, I decided on the Raspberry Pi (RPi) 3b as it is such a significant device to our home. I may add another frame to house a RPi Zero for another project in a few months. For now, the frame currently sits on my desk but I plan to hang this on a significant wall in the house and make a feature of it including some internal lighting.

The list below is a summary of bits I used:
- Picture Ribba frame – IKEA £3.50
- Black backboard – cut from a recycled notepad
- Mounting nuts/bolts – taken from a spare Raspberry Pi case
OpenHab
For those wanting to know what that other bit is that is included in the picture frame. It’s a RF transmitter (315MHz). This RPi runs OpenHab where I have some rules that trigger my projector blind to come down or go back up when using my Logitech Harmony remote. Personally, I think the picture frame looks better for having something alongside the RPi rather than having it sat there by itself. I’ll have some more posts on this topic very soon!

